
“How does a Galileo thermometer work?”

Ignore the storm glass on the right. It’s the floating bubbles in the thing on the left we’re interested in. (Photo: Shala Howell)
Too many weeks for a toddler to count ago, I promised you that we’d talk about how a Galileo thermometer actually works. I fully intended to answer this question at the time, but somehow kept finding one reason or another to put it off. Over the past few weeks, I’ve been wildly productive in every aspect of my life except Caterpickles.
Since I first taunted you with a Galileo thermometer, I’ve finished my taxes, edited a book on how even artistically challenged parents can use public art to foster a love of art in their children, sent the book and the 100 photographs that populate it to a book designer for layout, gone on Spring Break, created a photo book documenting said Spring Break, and cleaned my entire house. Several times. It was only when I caught myself rolling up my sleeves to organize my pantry this morning that I realized just how much effort I had put into avoiding this post.
There’s only thing to do when that happens. Pick a Quit Date. Today, April 17, is the day I quit allowing my brain to blow this question up into something that feels impossible to answer.
Since this question is a bit overwhelming for me, let’s break it down into manageable parts.
Part 1: “How do you use a Galileo thermometer?”
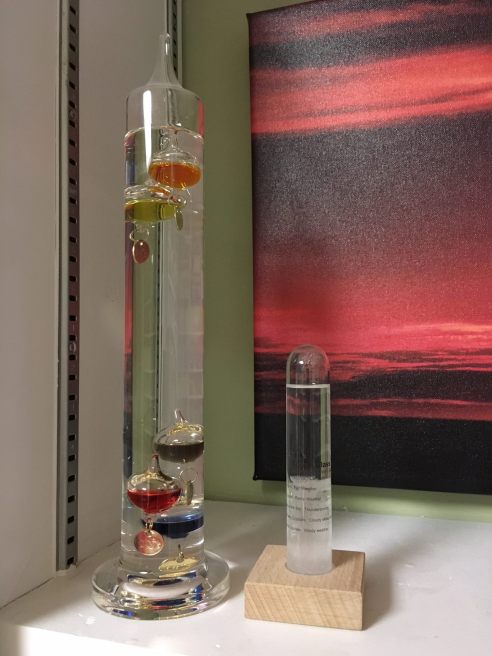
My retro weather center. The storm glass is on the right, making its bold prediction of cloudy skies in Chicago in winter. The glass tube on the left is Galileo’s thermometer. (Photo: Shala Howell)
Yes, I have already answered this question. But when I’ve been beaten into a corner by a hard question, I find it helpful to remember the little bits of it I’ve already conquered.
So, as a refresher, to use a Galileo thermometer, you read the label on the lowest bubble in the cluster at the top of the thermometer. If you live in the United States, you then convert that temperature to Fahrenheit.
Part 2: “Does a Galileo thermometer actually work?”
This one’s easy. I don’t even have to leave my house to answer it. Thanks to the miracle of vintage buildings, my condo has two distinct weather zones: A temperate zone where my office is located and a much colder zone in the back. The temperature differences between these two zones can get pretty extreme in winter. On warm days like today, the two zones are much closer, but the differences are still enough to register on my thermometer.
Let’s try it out.

In the office. (Photo: Shala Howell)
Our Galileo thermometer normally lives in my office, where it’s currently registering a balmy 24°C / 75.2° F.
Sadly the glare on this photo makes it impossible for you to read the numbers on the label for the bubble, so you’ll have to just take my word for it.

In the guest room. (Photo: Shala Howell)
When I moved the thermometer back to the guest room in the Cold Zone, the bubbles inside almost immediately started shifting. Within five minutes, the thermometer was reporting that the Guest Room was a mere 22°C / 71.6°F. Frankly, I was surprised the differences registered so quickly.
But there it was, clear evidence that our Galileo thermometer wasn’t completely broken.
If I were really motivated, I’d repeat the test with a second thermometer that I’m sure works to verify the readings on the Galileo. But sometimes that sort of perfection is just another way of tossing up hurdles between you and the good-enough answer to the big question you’re avoiding, so I’m going to stop here.
Now that my curiosity centers are all warmed up, let’s tackle The Ten-Year-Old’s real question.
Part 3: “How does a Galileo thermometer work?”
When The Ten-Year-Old first asked this question at dinner many moons ago, Daddyo knew the answer right away. Galileo thermometers operate on the principle that the density of a liquid changes with temperature, and that lower density objects float in higher density liquids.
When you heat a liquid, the molecules in it speed up and spread further apart. Increasing the temperature makes a liquid slightly less dense.
The opposite is also true: When you cool a liquid down, the molecules in it slow down and become more compact. The liquid becomes slightly more dense.
Fun Fact: Hot water floats on top of cold water. The ACS Middle School Chemistry page has a simple experiment you can do with your kids to prove this to them this in real life (I know what The Ten-Year-Old and I will be doing on her next day off).
“You know, Shala, this would make an excellent Caterpickle,” Daddyo said without any discernible malice. “You could figure out which liquids they use in each bubble, calculate their relative densities, and that would tell us why each bubble drops at the temperature it does.”
That sounded like a complete slog. So you see, it’s really Daddyo’s fault that it’s taken me this long to answer the question.
However, I should have had more faith in American manufacturing. Naturally, the manufacturers of modern Galileo thermometers would want to streamline the production process as much as possible. According to How Stuff Works, the large tube and the glass bubbles inside it all contain the same liquid — either alcohol or water (with appropriate doses of food coloring to make the bubbles pretty).
The glass bubbles themselves are hand-blown, so they vary a bit in size and shape. Before sealing the bubbles inside the glass tube, the manufacturer adds a slightly different amount of liquid to each bubble. The bubbles are calibrated so that the overall ratio of glass, air, and liquid yields a density that equals the density of the surrounding liquid in the glass tube.
Wait, if the bubbles and the surrounding liquid all have the same density, why do some bubbles float and others sink?
The magic is in the little metal tag. Each tag is precisely calibrated to change the density of the bubbles just enough so that they sink at a particular temperature.
Since cold water is denser than warmer water, the metal tags for the lower temperatures are slightly heavier than the metal tags attached to the bubbles for the higher temperatures.
So how does this play out in real life?
Let’s look back at Part 2.
In the office, our Galileo thermometer reports a temperature of approximately 75°F. At 75°F, the three lowest temperature bubbles have a density greater than that of the surrounding water, so they drop to the bottom of the tube. The tags on the remaining two bubbles are lighter, giving them a lower overall density than the surrounding water, so they float.
When I moved the thermometer to the guest room, the temperature in the guest room was cool enough to reduce the temperature of the water in the main tube to approximately 71°F. Remember, the density of water increases as the temperature drops. In this case, the density of the water increased just enough to send the middle bubble with its slightly lower density back to the top of the tube.
And that, Dear Reader, is how a Galileo thermometer works. (Whew!)
Related Links:
- How does a Galileo thermometer work? (How Stuff Works)
- Temperature affects density (ACS Middle School Chemistry)
- “How do I use a Galileo thermometer?” (Caterpickles)

2 Responses to ““How does a Galileo thermometer work?””
[…] my little Caterpickle, is a question for next week. Who knows? We might even do a bit of experimenting to see if the theory actually […]
LikeLike
[…] Each ball is hand-blown with unique characteristics4 […]
LikeLike